One thing the video doesn’t really make clear is that all 5 magnetic stabilizer buttons have to be active in order to get to the final door. This means that the first two are clicked, allowing the other two players to hookshot to their buttons and push them, then everyone hookshots to the middle one, and one person hookshots to the final button. All this has to be done within about 30 seconds. Also, the hookshots are very unreliable — you can be teleported back to your starting point or even fall to your death if you hookshot from a slightly wrong location. Generally speaking, you want to do it from as far back as possible so the angle is shallower.
Also, once you have gotten the datacron, your red and blue crystals are destroyed and it is impossible to pick them up again. This means you can’t help anyone else get it, unless they open the museum door for you. The problem is if you die in the hookshot part you respawn at the medical droid, who is… in the museum. Meaning the whole group will have to start completely over to let you back in.
So lets start this off right.
First you need to head to the Ziost Shadow, and goto the Museum. (MAP)
Once you’re there, you’ll see a rather large room filled with objects and lore.
Look for the large republic medical support walker to your right. (IMAGE)
You can cheese killing yourself by jumping on the plaque at the front of the platform.
Go inside of the walker and use the panel to blow open the door. (BUTTON DESTROYED DOOR)
Now that you’re inside follow the path to the back and you will see a door open it and you can take a Cormium Crystal Shard, which you will need later. (IMAGE)
All right, its time to goto Corellia at Axiel Park at these coords 688,34. (MAP)
Look inside the cargo and you will see a skull much like that at the Imperial Fleet with a Red Crystal. Loot it. (IMAGE)
Now that you have the Corellian Museum Crystal head back to the Ziost Shadow.
Hop up the statue on the left from the back, and place the crystal in the socket. (IMAGE)
You should see a spark on a tiny panel right next to you, click it and it will break the shield that leads to the maintenance tunnels. (PLANEL TUNNEL DOOR)
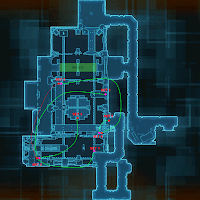
Now that you’re in the tunnels you’ll need this reference Map.
You’ll need 4 players or more from here on out and everyone needs an MGGS – info on where to get it is in the comments.
In this large room there are a total of 6 Bridge Control Units (3 on each side), 3 need to be activated at a time to bring a player across.
Once you’ve done this you’re now in the harder part. Searching for Toggles to activate the MGGS Hook Panels.
Follow the Sets 1 – 5 and you’ll move across easily as the panels stay active for about 20 seconds.
/stuck is your friend; Once you’ve activated both Sets 1 & 2 in quick succession have everyone type /stuck to goto the bridge control and run up and Grapple to Set 3 allowing you to Grapple Set 4 so you can Toggle the last hook with ease.
Hook & Button Locations
Set 1:
North and South Toggles from Main “Bridge”
South Toggle
Set 2:
North Grapple Point
North Toggle
South Grapple Point
South Toggle
Set 3:
Grapple from Bridge – Look Up to find the Point
Set 4:
Grapple Point – Right side on Screenshot
Set 5:
Grapple Point – Center of Screenshot
Enjoy the Datacron with a Cutscene!
Don’t forget to check out constantly growing list of guides for Star Wars: The old republic


